I updated everything to the latest Unity Editor. Also realized I had the wrong shaders on my hairs, those are fixed and the hairs look MUCH better!
8.4 KiB
Custom C# node attributes reference
You can add attributes to a node class and port variable definitions to customize the look of a Custom C# node.
Node class attributes
You can customize the titles that appear on a node, where it appears in the fuzzy finder, and its icon. Node class attributes must be placed above the node class definition in a node's C# script.
Visual Scripting has 5 node class attributes:
Usually, Visual Scripting automatically applies any changes you make to a node's class attributes after you save the C# file.
UnitTitle
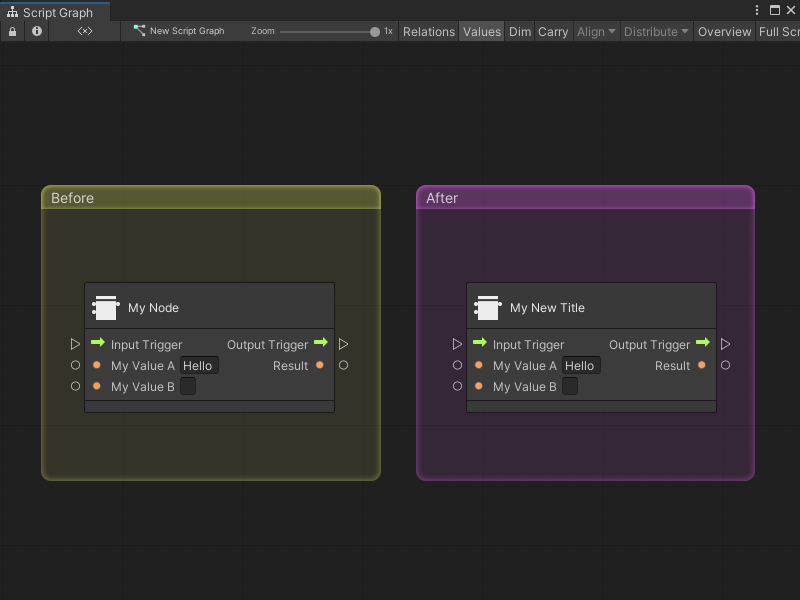
You can specify a [UnitTitle] to display a different title than the node's class name on the node when it appears in a Script Graph, and when you view details about the node in the Graph Inspector:
using System;
using Unity.VisualScripting;
using UnityEngine;


[UnitTitle("My New Title")]
public class MyNodeAfter : Unit
{
    ...

   }
}
The [UnitTitle] attribute overrides the node's class name.
UnitShortTitle
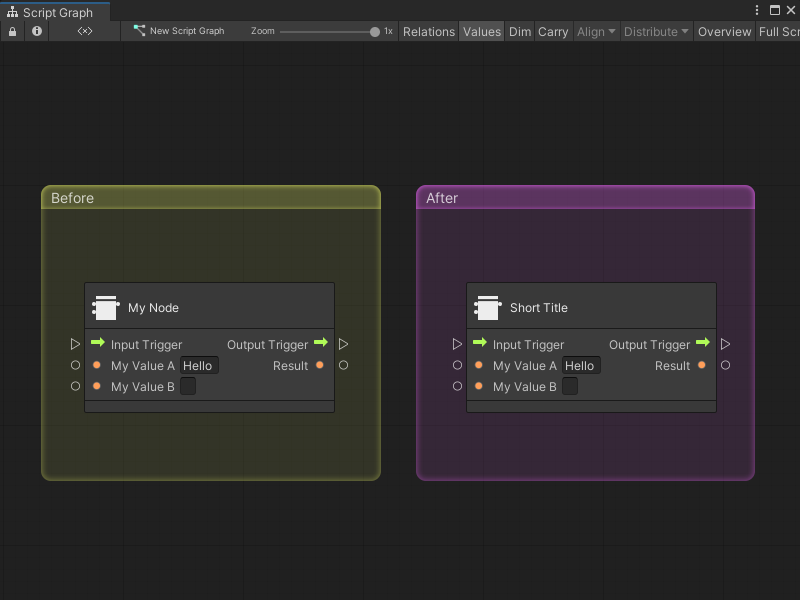
You can specify a [UnitShortTitle] to display a different title on the node when it appears in a Script Graph:
using System;
using Unity.VisualScripting;
using UnityEngine;


[UnitShortTitle("Short Title")]
[UnitTitle("My New Title")]
public class MyNodeAfter : Unit
{
    ...

   }
}
The [UnitShortTitle] only appears on the node in a Script Graph. The [UnitTitle] or node class name still displays in the Graph Inspector.
UnitSubtitle
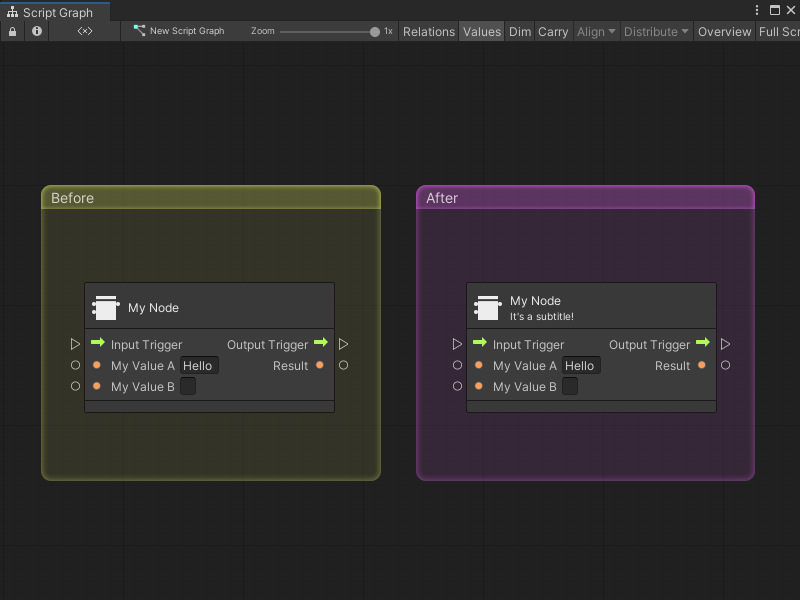
You can add a [UnitSubtitle] to add a line of text below the [UnitTitle], [UnitShortTitle], or node class name when a node appears in a Script Graph:
using System;
using Unity.VisualScripting;
using UnityEngine;


[UnitSubtitle("It's a subtitle!")]
[UnitShortTitle("Short Title")]
[UnitTitle("My New Title")]
public class MyNodeAfter : Unit
{
    ...

   }
}
The [UnitSubtitle] doesn't appear in the Graph Inspector.
UnitCategory
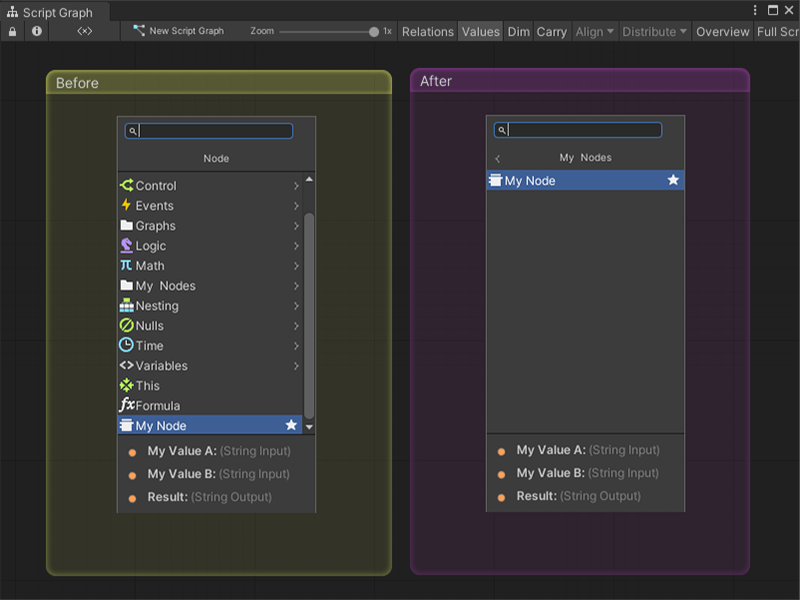
You can specify a [UnitCategory] to tell Visual Scripting where to place the node in the fuzzy finder:
using System;
using Unity.VisualScripting;
using UnityEngine;


[UnitCategory("FirstLevel/SecondLevel")]
public class MyNodeAfter : Unit
{
    ...

   }
}
Replace FirstLevel with the name of the top-level category in the fuzzy finder where you want Visual Scripting to place the node. Replace SecondLevel with the name of a subcategory. Visual Scripting creates the categories if they don't already exist in the fuzzy finder.
Note
You must regenerate your Node Library for changes made to a node's
[UnitCategory]to take effect.
TypeIcon
You can use the [TypeIcon] attribute to change the icon that appears on a node when it appears in a Script Graph:
using System;
using Unity.VisualScripting;
using UnityEngine;


[TypeIcon(typeof(ToggleValue))]
public class MyNodeAfter : Unit
{
    ...

   }
}
The icon for the node changes in the Graph Inspector, too.
Note
You can't point to your own custom icons from this attribute. You must use an icon from the Visual Scripting icons library, which includes all Unity types.
Port attributes
Custom nodes have one mandatory port attribute and one optional port attribute: DoNotSerialize and PortLabelHidden, respectively. Port attributes must be placed above your variable declarations for each port variable in the node.
Visual Scripting automatically applies any changes you make to a node's port attributes after you save the script file.
DoNotSerialize
[DoNotSerialize] is a mandatory attribute for all ports on custom nodes. Add this attribute to avoid serialization of data that shouldn't be serialized:
using System;
using Unity.VisualScripting;
using UnityEngine;


[UnitShortTitle("Short Title")]
[UnitTitle("My New Title")]
[UnitCategory("My Nodes")]
[UnitSubtitle("It's a subtitle!")]
[TypeIcon(typeof(Color))]

public class MyNodeAfter : Unit
{
   [DoNotSerialize]
   public ControlInput inputTrigger;

   [DoNotSerialize]
   public ControlOutput outputTrigger;

   [DoNotSerialize]
   public ValueInput myValueA;

   [DoNotSerialize]
   public ValueInput myValueB;

   [DoNotSerialize]
   public ValueOutput result;

   private string resultValue;

   protected override void Definition()
   {
       ...
   }
}
PortLabelHidden
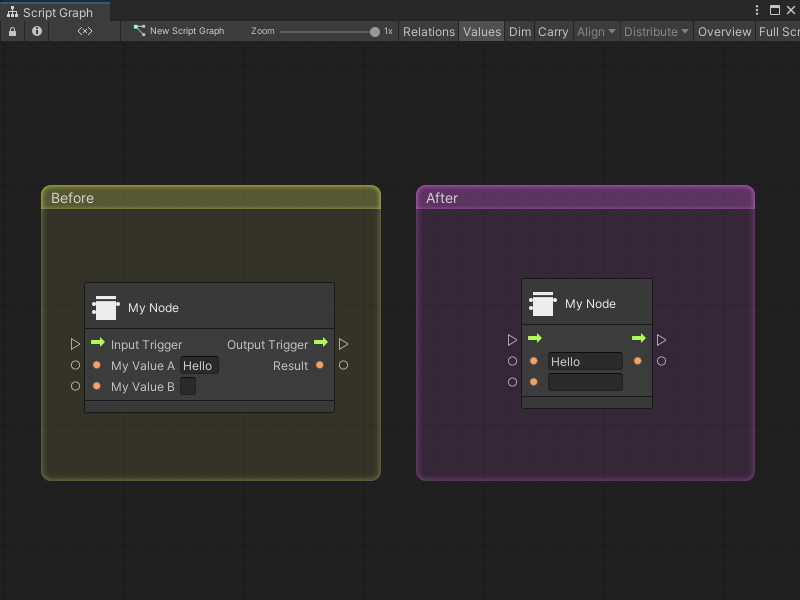
You can add the [PortLabelHidden] attribute to hide the name label for any port on a node when it appears in a Script Graph:
using System;
using Unity.VisualScripting;
using UnityEngine;


[UnitShortTitle("Short Title")]
[UnitTitle("My New Title")]
[UnitCategory("My Nodes")]
[UnitSubtitle("It's a subtitle!")]
[TypeIcon(typeof(Color))]

public class MyNodeAfter : Unit
{
   [DoNotSerialize]
   [PortLabelHidden]
   public ControlInput inputTrigger;

   [DoNotSerialize]
   [PortLabelHidden]
   public ControlOutput outputTrigger;

   [DoNotSerialize]
   public ValueInput myValueA;

   [DoNotSerialize]
   public ValueInput myValueB;

   [DoNotSerialize]
   public ValueOutput result;

   private string resultValue;

   protected override void Definition()
   {
       ...
   }
}
The port's label is still visible in the Graph Inspector. Use the same name in a port's variable definition and the port's key in the Definition method for the node's class, as shown:
using System;
using Unity.VisualScripting;
using UnityEngine;

public class MyNode : Unit
{
    ...

   [DoNotSerialize, PortLabelHidden]
   public ValueInput myValueA;

   [DoNotSerialize, PortLabelHidden]
   public ValueInput myValueB;

    ...

   protected override void Definition()
   {
       ...

       myValueA = ValueInput<string>("myValueA", "Hello ");
       myValueB = ValueInput<string>("myValueB", String.Empty);

    ...
   }
}
