9.4 KiB
Example: How to create a custom rendering effect using the Render Objects Renderer Feature
URP draws objects in the DrawOpaqueObjects and DrawTransparentObjects passes. You might need to draw objects at a different point in the frame rendering, or interpret and write rendering data (like depth and stencil) in alternate ways. The Render Objects Renderer Feature lets you do such customizations by letting you draw objects on a certain layer, at a certain time, with specific overrides.
The example on this page describes how to create a custom rendering effect with the Render Objects Renderer Feature.
Example overview
The example on this page demonstrates how to implement the following effect:
-
There is a character in the Scene.
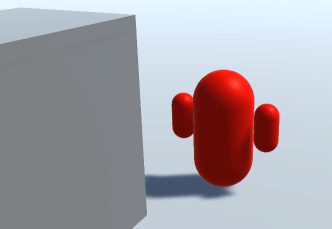
-
When the character goes behind GameObjects, Unity draws the character silhouette with a different Material.
Prerequisites
This example requires the following:
-
A Unity project with the URP package installed.
-
The Scriptable Render Pipeline Settings property refers to a URP asset (Project Settings > Graphics > Scriptable Render Pipeline Settings).
Create example Scene and GameObjects
To follow the steps in this example, create a new Scene with the following GameObjects:
-
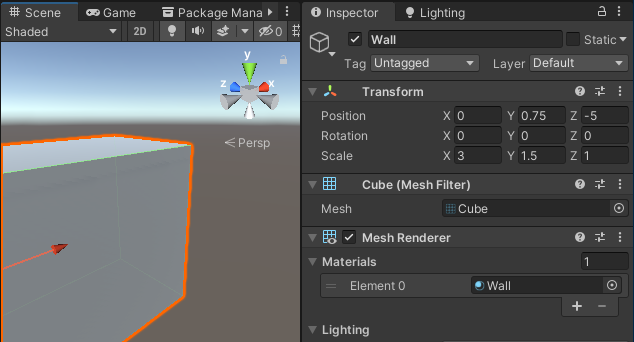
Create a Cube. Set its Scale values so that it looks like a wall.
-
Create a Material and assign it the
Universal Render Pipeline/Litshader. Select the base color (for example, red). Call the MaterialCharacter. -
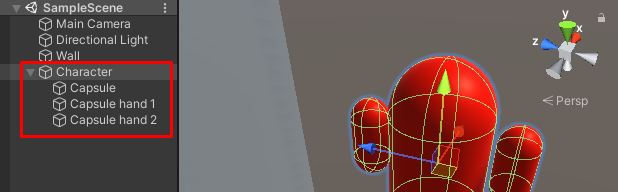
Create a basic character and assign it the Character Material. In this example, the character consists of three capsules: the big capsule in the center represents the body, and the two smaller capsules represent the hands.
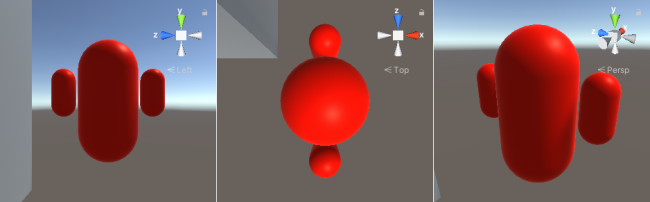
To make it easier to manipulate the character in the Scene, add the three Capsules as child GameObjects under the Character GameObject.
-
Create a Material and assign it the
Universal Render Pipeline/Unlitshader. Select the base color that you would like the character to have when it's behind GameObjects (for example, blue). Call the MaterialCharacterBehindObjects.
Now you have the setup necessary to follow the steps in this example.
Example implementation
This section assumes that you created a Scene as described in section Example Scene and GameObjects.
The example implementation uses two Render Objects Renderer Features: one to draw parts of the character that are behind other GameObjects, and another one to draw the parts of the character that are in front of other GameObjects.
Create a Renderer Feature to draw the character behind GameObjects
Follow these steps to create a Renderer Feature to draw the character behind GameObjects.
-
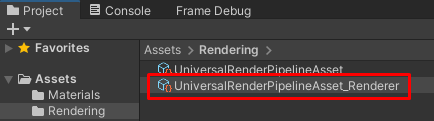
Select a URP Renderer.
-
In the Inspector, click Add Renderer Feature and select Render Objects.

Select the Name field and enter the name of the new Renderer Feature, for example, DrawCharacterBehind.
-
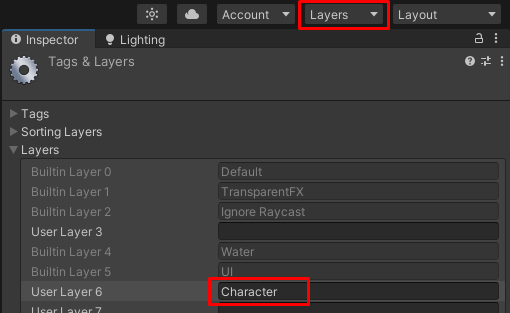
This example uses Layers to filter the GameObjects to render. Create a new Layer and call it Character.
-
Select the Character GameObject and assign it to the
CharacterLayer. To do this, open the Layer drop down and selectCharacter.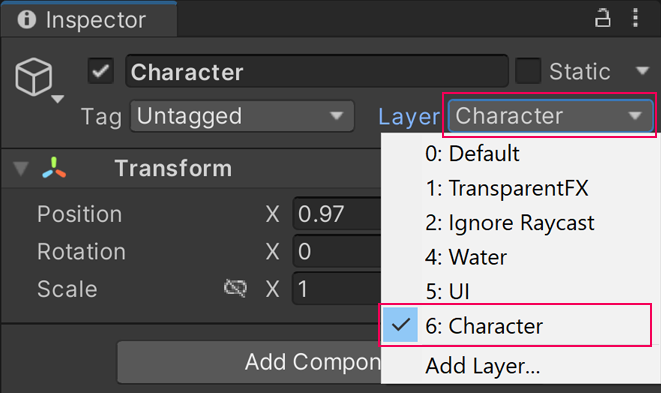
-
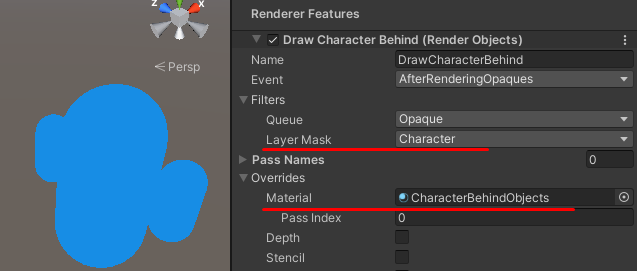
In the
DrawCharacterBehindRenderer Feature, in Filters > Layer Mask, selectCharacter. With this setting, this Renderer Feature renders GameObjects only in the LayerCharacter. -
In Overrides > Material, select the
CharacterBehindObjectsMaterial.The Renderer Feature overrides the Material of a GameObject with the selected Material.
-
The intended behavior is that the Renderer Feature renders the character with the
CharacterBehindObjectsMaterial only when the character is behind other GameObjects.To achieve this, select the Depth check box, and set the Depth Test property to Greater.
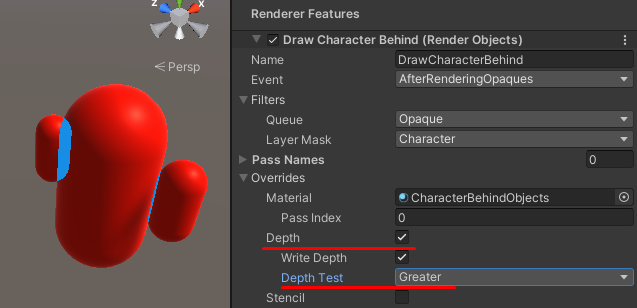
With these settings, Unity renders the character with the CharacterBehindObjects Material only when the character is behind another GameObject. However, Unity also renders parts of the character using the CharacterBehindObjects Material, because some parts of the character occlude the character itself.
Create an extra Renderer Feature to avoid the self see-through effect
The settings in the previous section result in the self see-through effect for the following reason:
-
When performing the Opaque rendering pass of the URP Renderer, Unity renders all GameObjects belonging to the character with the
CharacterMaterial and writes depth values to the Depth buffer. This happens before Unity starts executing theDrawCharacterBehindRenderer Feature, because, by default, new Render Objects Renderer Features have the value AfterRenderingOpaques in the Event property.The Event property defines the injection point where Unity injects Render Passes from the Render Objects Renderer Feature. The event when URP Renderer draws GameObjects in the Opaque Layer Mask is the BeforeRenderingOpaques event.
-
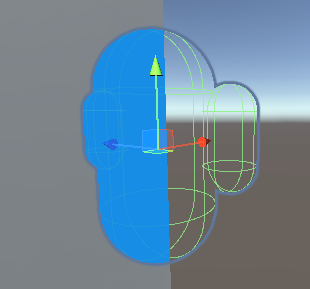
When executing the
DrawCharacterBehindRenderer Feature, Unity performs the depth test using the condition specified in the Depth Test property. In the following screenshot, a bigger capsule occludes part of the smaller capsule, and the depth test passes for that part of the smaller capsule. The Renderer Feature overrides the Material for that part.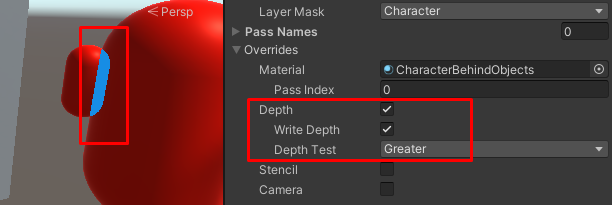
The following steps describe how to avoid such behavior and ensure that Unity draws all parts of the character with proper Materials.
-
In the URP asset, in Filtering > Opaque Layer Mask, clear the check mark next to the
CharacterLayer.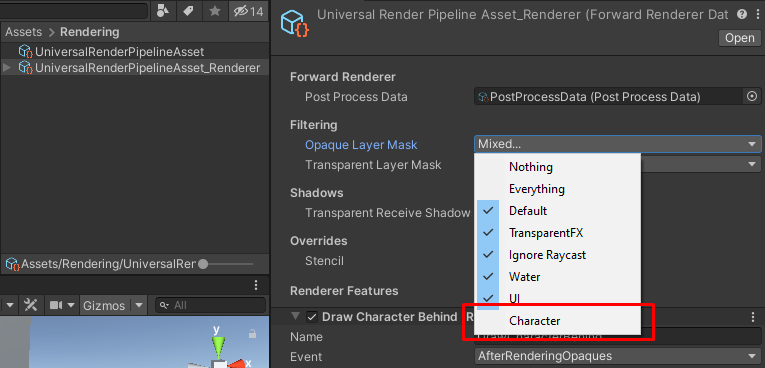
Now Unity does not render the character unless it's behind a GameObject.
-
Add a new Render Objects Renderer Feature, and call it
Character. -
In the
CharacterRenderer Feature, in Filters > Layer Mask, select theCharacterLayer.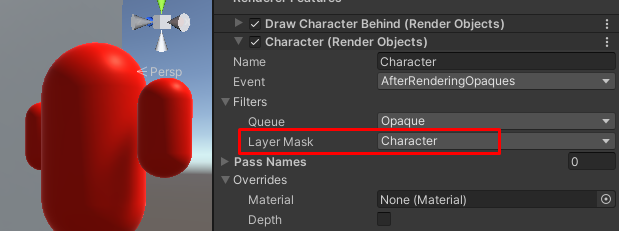
Now Unity renders the character with the
CharacterMaterial even when the character is behind GameObjects.This happens because the
DrawCharacterBehindRenderer Feature writes values to the depth buffer. When Unity executes theCharacterRenderer Feature, the pixels on the character appear to be in front of the pixels that Unity has drawn previously, and Unity draws on top of those pixels. -
In the
DrawCharacterBehindRenderer Feature, In Overrides > Depth, clear the Write Depth check box. With this setting, theDrawCharacterBehindRenderer Feature does not make changes to the depth buffer and theCharacterRenderer Feature does not draw the character when it's behind GameObjects.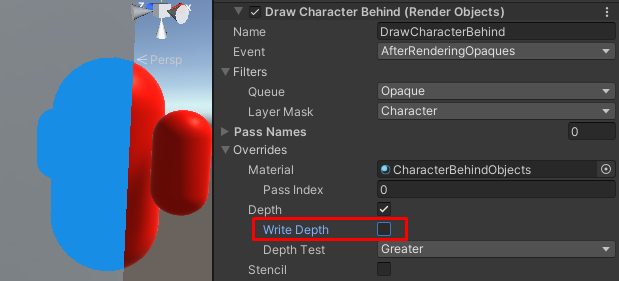
The example is complete. When the character goes behind GameObjects, Unity draws the character silhouette with the CharacterBehindObjects Material.
With the extra Character Renderer Feature, Unity renders GameObjects as follows:
-
URP Renderer does not render the
CharacterGameObject in the BeforeRenderingOpaques event, because theCharacterLayer is excluded from the Opaque Layer Mask list. -
The
DrawCharacterBehindRenderer Feature draws parts of the character that are behind other GameObjects. This happens in the AfterRenderingOpaques event. -
The
CharacterRenderer Feature draws parts of the character that are in front of other GameObjects. This happens in the AfterRenderingOpaques event, and after executing theDrawCharacterBehindRenderer Feature.
To see another use case of the Render Objects Renderer Feature, refer to the Object Occlusion Scene in the Universal Rendering Examples project.