5.6 KiB
Preparing character artwork
The 2D Animation package is used together with the PSD Importer package to import of your artwork for animation. The PSD Importer imports the graphic data from each Photoshop Layer as Sprites, and provides various importer options that prepare your artwork for animation. The PSD Importer currently only supports the Adobe Photoshop .psb file format, thus it is recommended to create your artwork in Adobe Photoshop or any other graphic software which supports the Adobe .psb file format.
When preparing your character or prop artwork, it is recommended to prepare them in a neutral or idle position. Depending on the complexity and use of your animation, it is also recommended to separate the individual parts of the artwork onto different Photoshop Layers (see Example 1 below). The artwork file must be saved in the Adobe Photoshop .psb file format, which is functionally identical to the more common Adobe .psd format, but supports much larger images than the .psd format (up to 300,000 pixels in any dimension). You can convert existing artwork in the .psd format to the .psb format by opening and then saving them as .psb files in Adobe Photoshop.
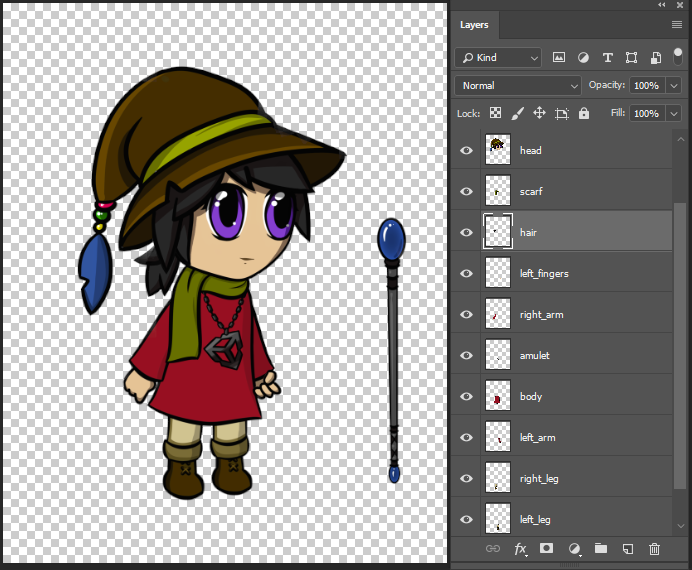
Example 1: Layered character artwork in Adobe Photoshop.
Once the artwork is imported, a Prefab is generated from the graphic data of each layer as individual Sprites, which may be arranged in their original position or as a Sprite sheet depending on the selected importer options. The generated Prefab is referred to as an 'actor' when used with the 2D Animation package.
PSD Importer features
The PSD Importer has many features and options that prepare the actor for animation. For example, enable the Mosaic option to have Unity automatically generate a Sprite sheet from the imported layers; or enable Character Rig to have Unity generate a Prefab with Sprites generated from the imported source file, with the Sprites arranged into their original positions based on the source file. Refer the PSD Importer's documentation for more information about the different options and their functions.
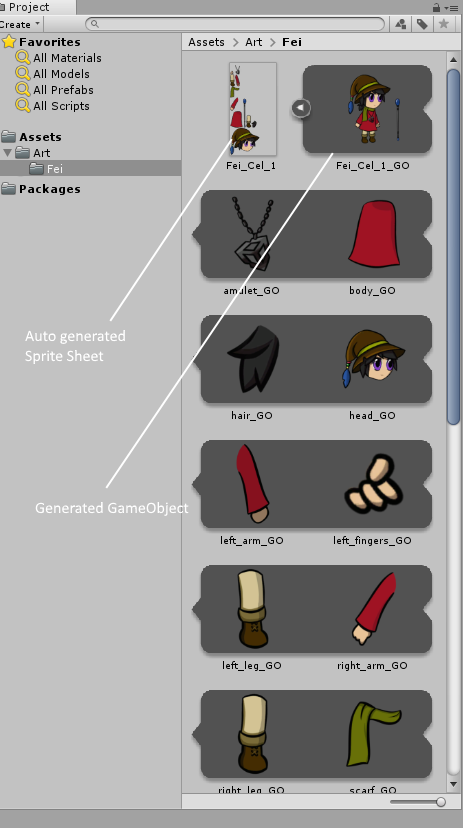
Example 2: The imported actor's layers arranged into a Sprite sheet, and reassembled into their original positions in the generated Prefab.
General workflow
There are several ways to animate with the 2D Animation package, depending on how your artwork is prepared and how your animation will be used in your Unity Project. Sample projects with examples of the different ways to use the 2D Animation package are distributed with the package, and can be imported via the Package Manager. Refer to the Samples documentation for more information.
The following is a general workflow for importing a multilayered and multipart character into Unity for 2D animation with the PSD Importer, with a more detailed specific example available in the Character imported with the PSD Importer sample documentation:
- Save your artwork as a .psb file in Adobe Photoshop by selecting the Large Document Format under the Save As menu, or convert an existing .psd file into the .psb format which is supported by the PSD Importer.
- Import the .psb file into Unity with the PSD Importer, which generates a Prefab containing Sprites based on the layers of the source file. This Prefab is referred to as an 'actor' when used with the 2D Animation package.
- Select the actor and go to its Inspector window to select its Importer settings. Refer to the PSD Importer documentation and the imported Samples and respective documentation to determine which settings are a best fit for your Project.
For example, the following are the recommended import settings for a character with multiple limbs and layers in its source file:
- Set Texture Type to Sprite(2D and UI).
- Set Sprite Mode to Multiple.
- Select the Mosaic check box.
- Select the Character Rig check box.
- Select the Use Layer Grouping check box to preserve any Layer Groups in the original .psb source file.
- Select Apply to apply the above settings. The generated actor is now ready for rigging.
- Drag the actor Prefab into the Scene view to begin animating. Unity automatically adds the Sprite Skin component to the actor which deforms the Sprite using GameObject Transforms to represent the bones that are rigged and weighted to the Sprite in the Skinning Editor.